Getting Started With Staff Collaboration
Learn the basics of HelloShift's staff collaboration tools — notes, tasks, mentions, and team communication.
At the end of this article you will be able to:
Understand all of our Staff Collaboration features
How to use automated checklists for recurring tasks on a schedule
Know how to use all types of task assignments and pull reports on compliance
Notes & Tasks
First, we want to introduce you to notes. Within HelloShift, you can interact with individuals, departments or all staff at once using the notes section. Here you can tag teams, individuals, assets, rooms and all tags you’ve created within the system.
We always recommend tagging (using the @ sign) to mention teams or people related to the post, while also leveraging tags for assets,public spaces, room numbers and anything else that has a tag registered in the system. (i.e #boiler, #105, #pool, #lobby)
If you use mentions, your team will be properly notified when it’s a notice that involves them. If you use tags, you’ll then be able to see all notes where tag has been used inside the tag profile.
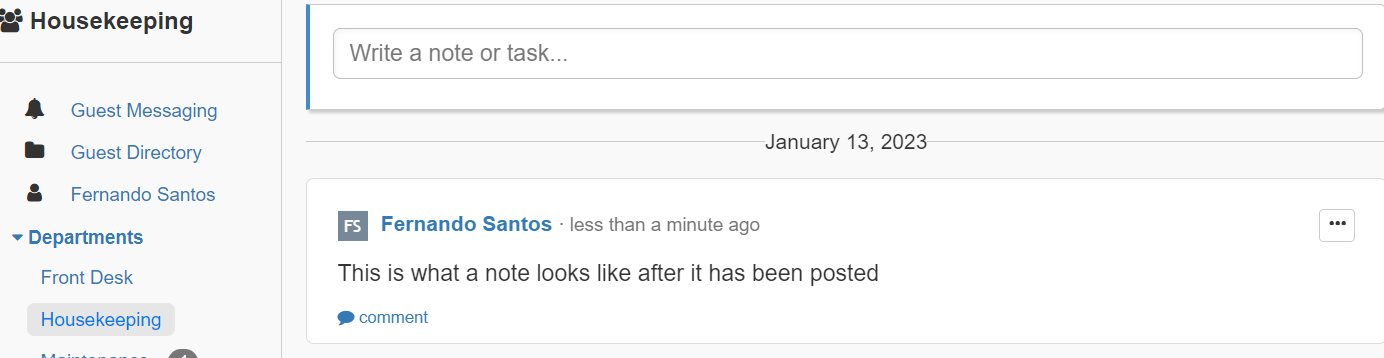
Whatever you type into the text box can be set as a note:
Or as a task:
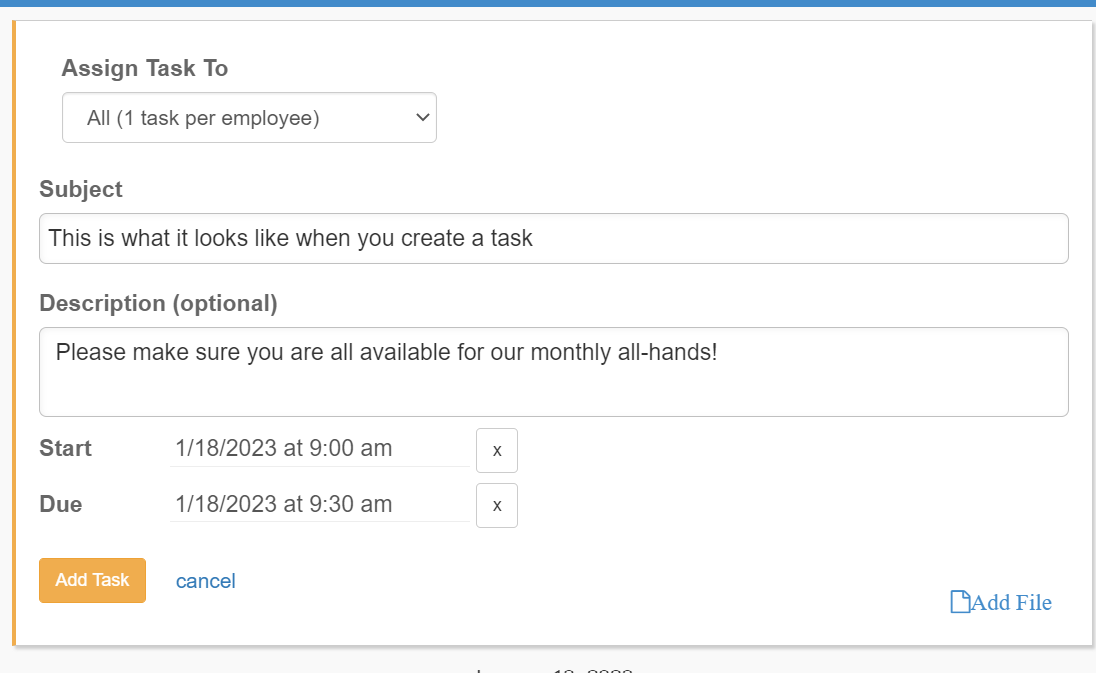
There is a lot to love about tasks:
You can assign them to an individual, a department, or everyone!
You can set a start and end time to serve as a reminder
You can add context by attaching a file: photo, documents, etc.
Tasks appear for everyone on the right side of their Feed to keep things top of mind
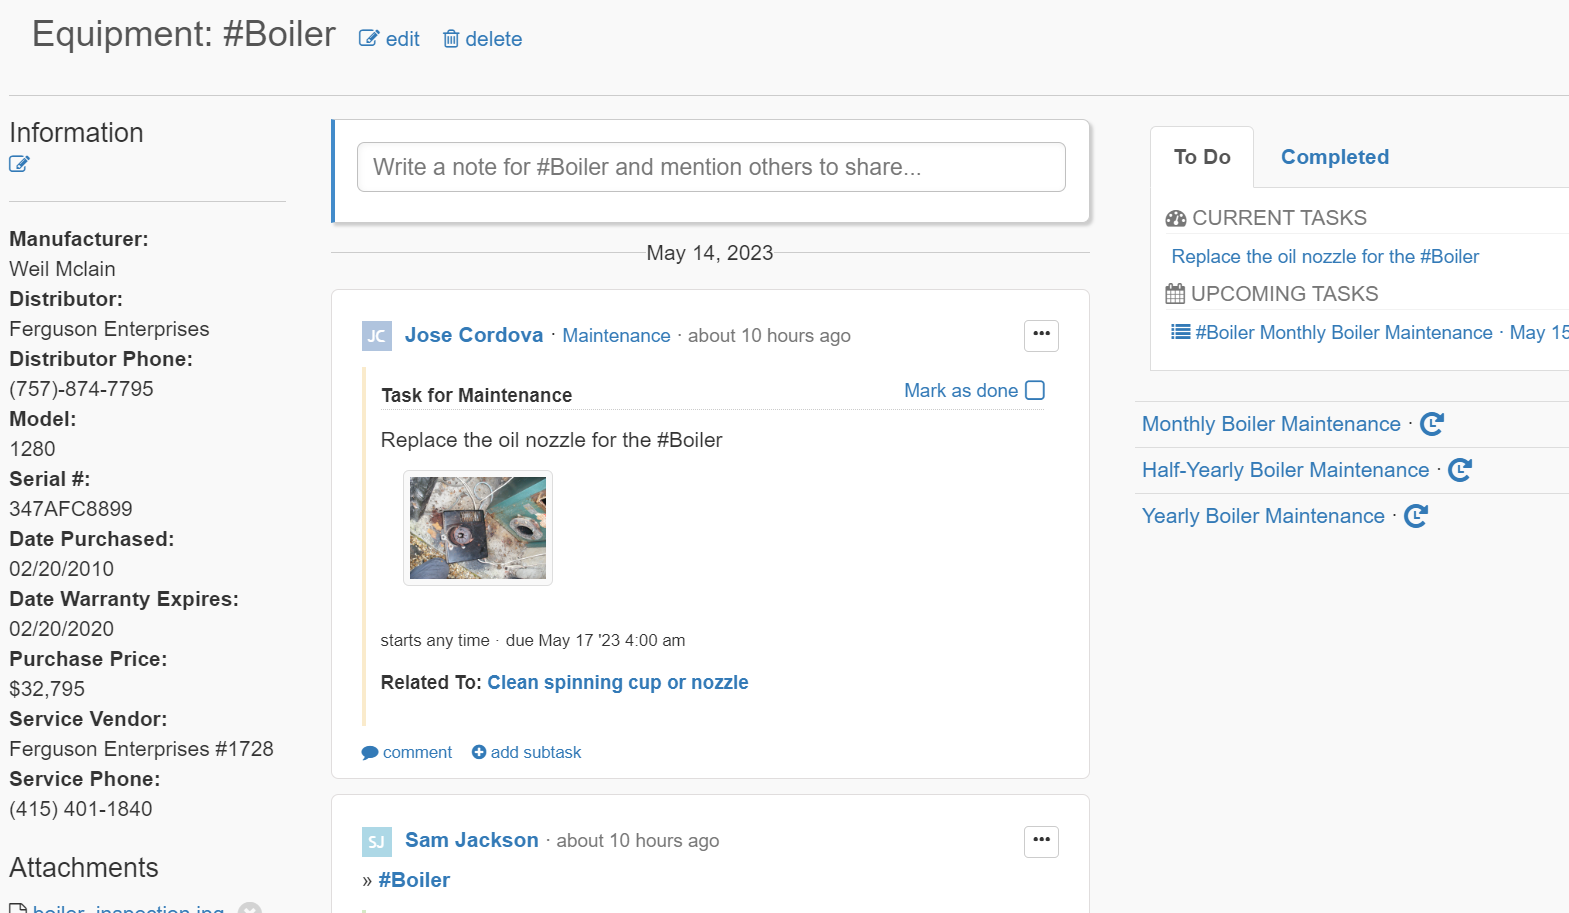
Once you post one, it will look just like this:
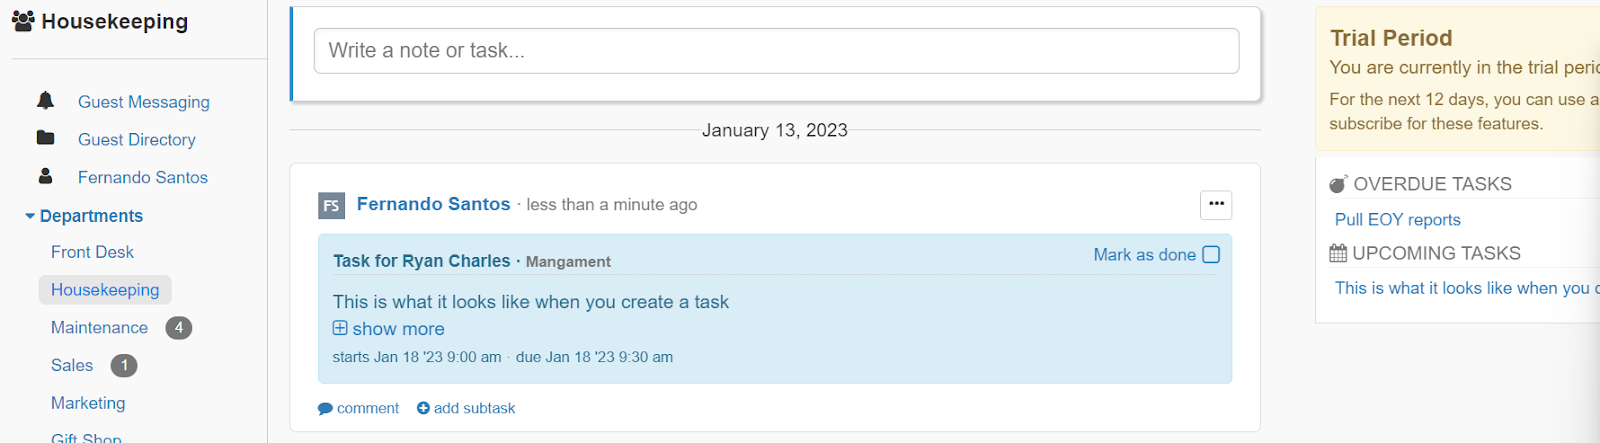
Tasks can be marked as done, you can also add subtasks, comments or files that relate to the request. On the right side of the wall everyone can see their new and upcoming tasks, as well as their overdue ones.
Staff > Checklists/Inspections
We love checklists; they take the pain out of assigning recurring tasks. For example, if you do room preventative maintenance, wouldn’t it be nice to have the work assign itself on schedule?
That is exactly what our checklists do. With them, you can create a series of individual taks neatly packed into a box. In this section, you can create new checklists and edit/delete existing ones.
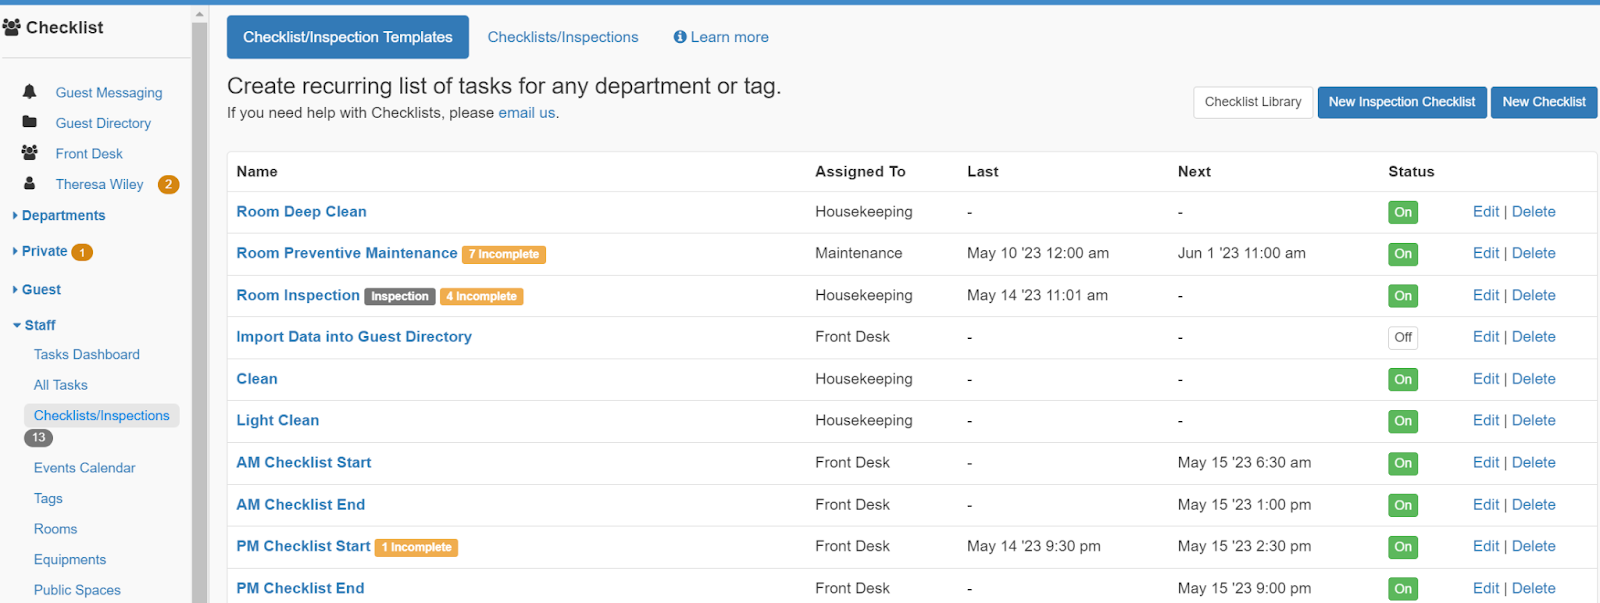
Creating your first checklist is simple; once you click to create your new checklist, you’ll see a few options:
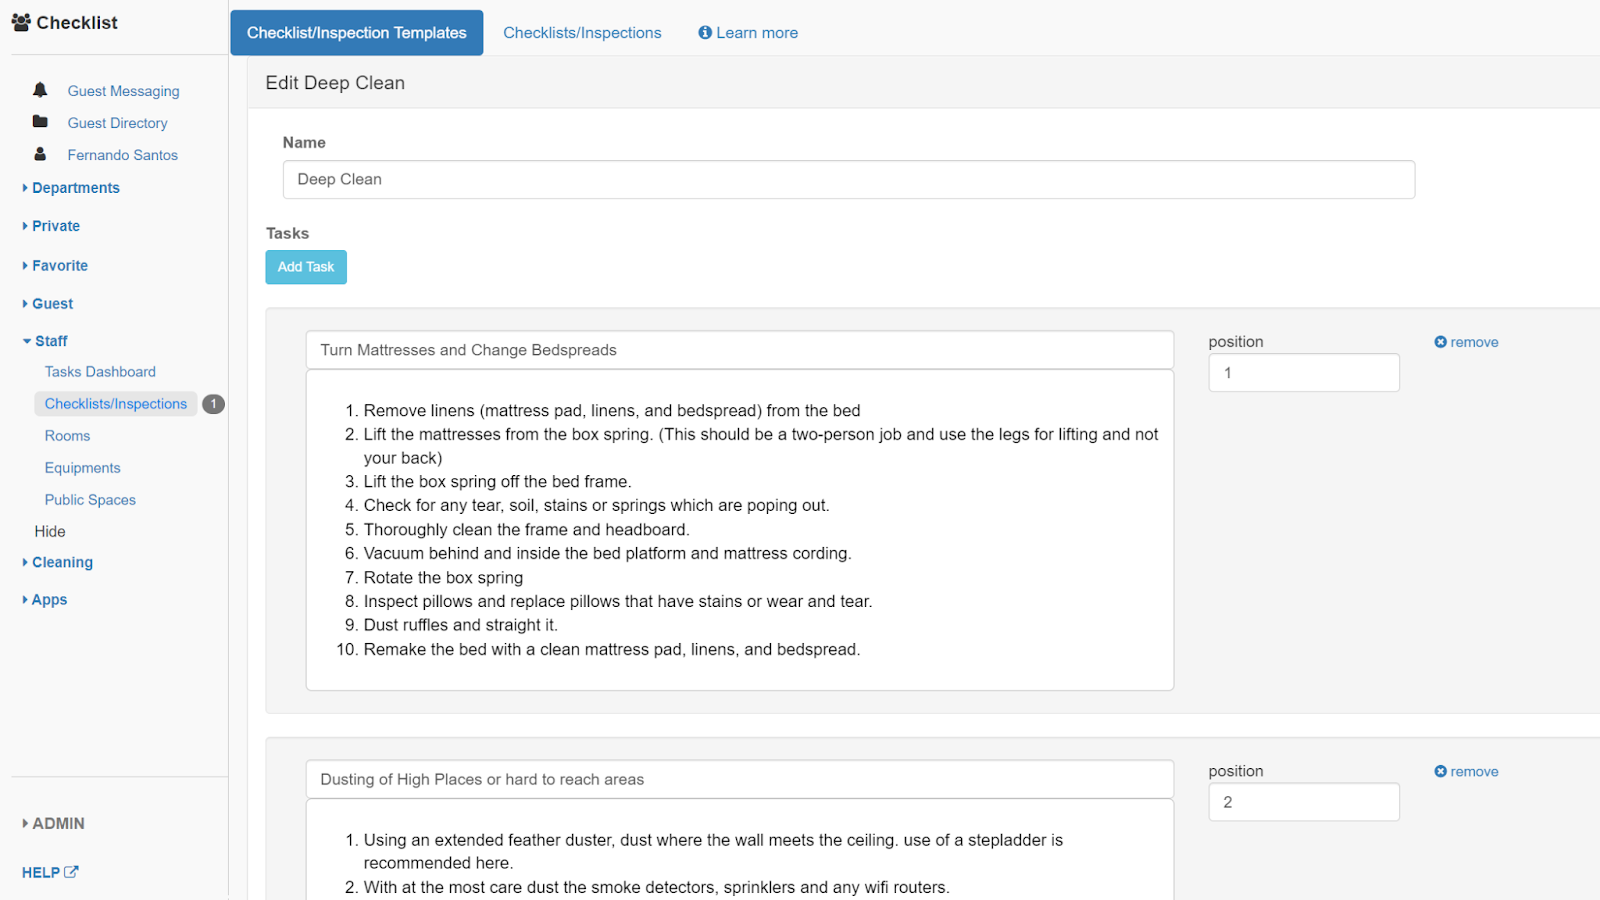
Inside your checklist builder, you’ll notice you can add as many tasks into the checklists as you need. You can also set a priority to define the order in which tasks should be completed; those with priority 1 will be completed first.
Once you are done with creating your list of tasks, you can add a schedule to your checklists. This is particularly useful for processes that repeat. For example, this room's preventative maintenance checklist will be assigned every three months to the maintenance team, and they will have 7 days to complete all tasks in the checklists upon assignation.
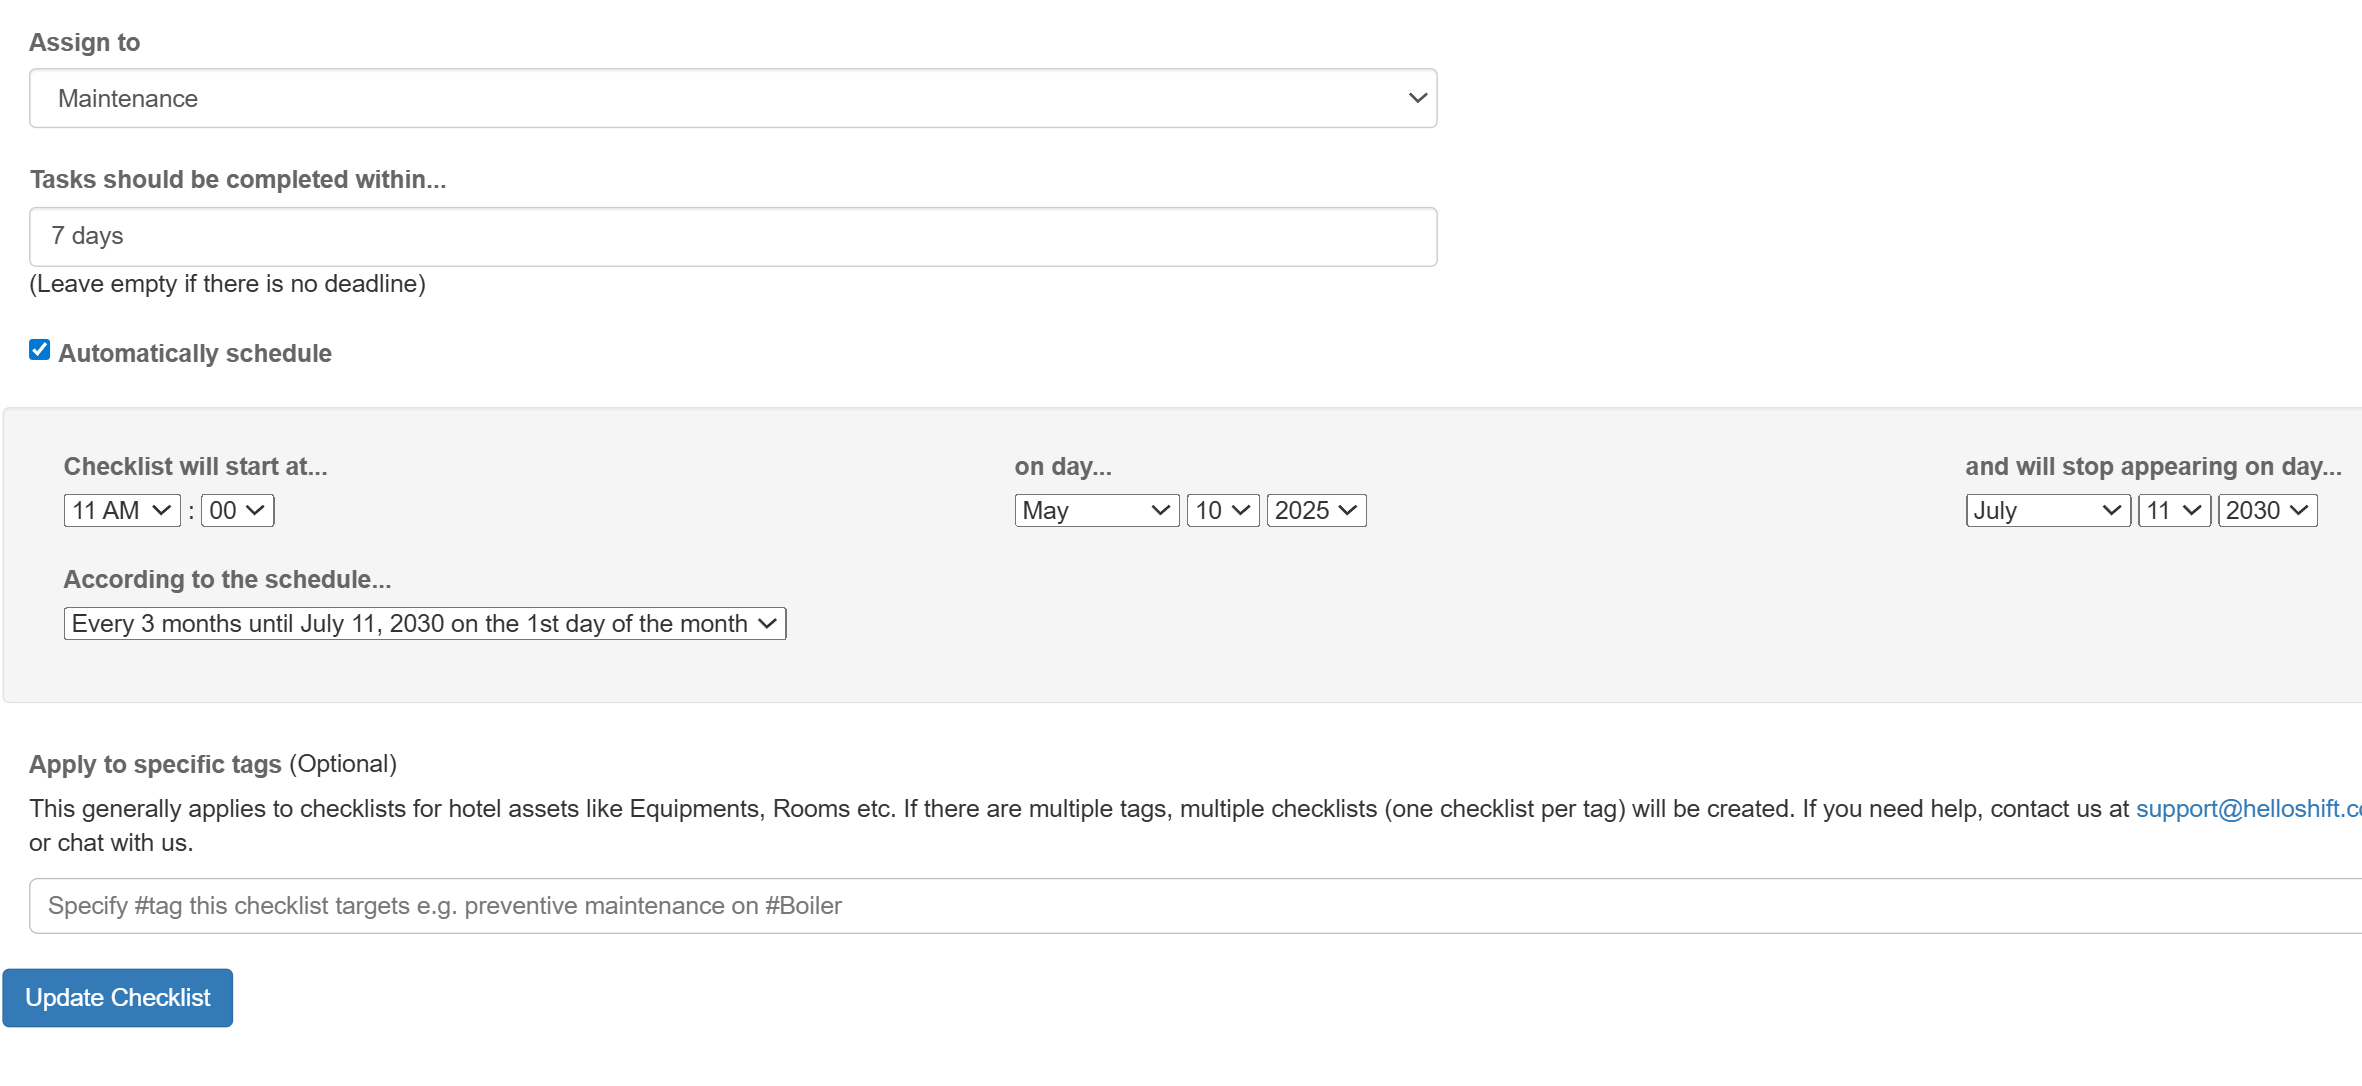
This type of auto-scheduling can serve as a reminder for your teams to complete specific tasks that we want to do recurringly!
Don’t know where to start?
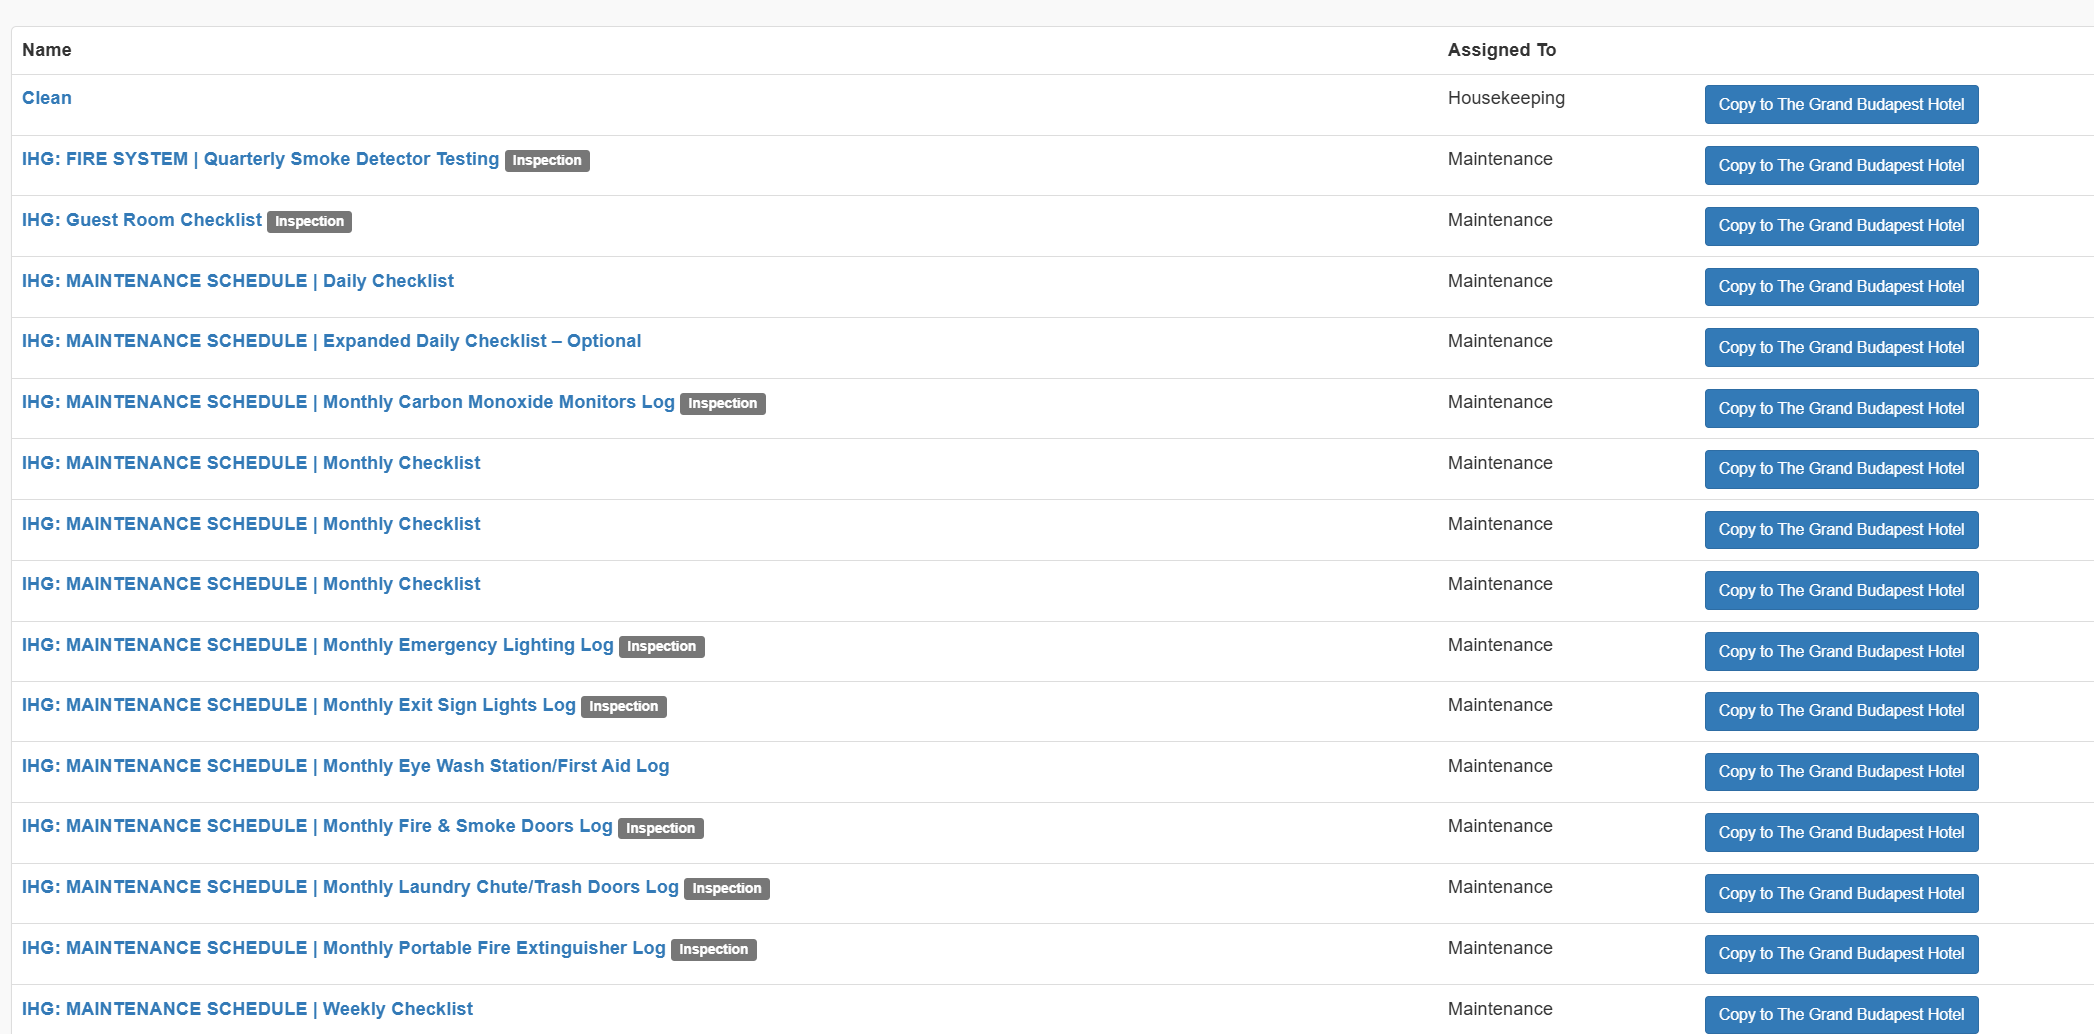
From your checklist home page, you can actually click over to our checklist library and find a few templates to get your creative juices flowing.

This library consists of checklists that are often used at different properties. Feel free to copy any checklist you like over to your site and edit accordingly!
Checklists can truly make maintenance a breeze and help you establish processes. for you and your staff.